Architects, interior designers, and builders. We understand when you hire an architectural photographer, you want the best possible images to showcase your project. To help you with that goal I've developed 5 TIPS to maximize your photography investment.
TIP 1: COMMUNICATE 🎤
When Greg was working on his bachelor's degree in photography, one class his professors did not teach was mindreading. I know it seems shortsighted but alas, it was not part of the curriculum.
What does that mean for you and your photographer? It means that sharing your expectations of the process, the timing, and the final image requirements is essential before you schedule the photo shoot. If what you’re envisioning isn’t possible, your architectural photographer should let you know and provide advice about how your vision may be achieved another way.
Some architectural photographers like to do things their way with minimal client input. It can be argued that this is not a photographer looking out for your best interest. Here are a few topics to discuss with your architectural photographer before signing a contract.
- Shot List. What areas are to be photographed? What views of each area are important? What story do you want to tell? Who is your target audience? Be sure to have a good idea of the shots you’re looking for before they are taken.
- Participate. Sometimes clients ask if they need to be present at the photoshoot. It depends on how long you’ve been working with the photographer. We believe that new clients need to be present at the photo shoot, as we’re just starting to learn their likes, dislikes, etc. Those clients with whom we’ve been working for a long time sometimes need to “phone it in” given their schedule. We do value the time spent together at a photo shoot with our clients. Getting their direct feedback about a photo we just took is invaluable and gives the best results for the client in the long run.
- End Goals. How will you use the photos? Are they for editorial advertising, tradeshow banners, a website, or social media? This is important for your photographer to know. For example, if the photo is for an editorial advertisement, then space should be left in the photo for the magazine to insert text without covering up your beautiful project.
- Theme. What’s the “vibe” you’re going for with the photos? Maybe something a bit moody with less lighting? Or perhaps a dusk shot with that beautiful post-sunset glow? Share examples of photos that speak to you and confirm that the photographer’s style is in line with your vision.
- Deadline. When will the final photos be sent to you? If you have a deadline for the photos sharing that up front is critical.
- Cost Sharing. Are there other people involved in your project, such as a cabinet maker, or tile installer? For example, if the photo shoot is focused on the kitchen, the aforementioned project partners may be interested in participating 💲 in the photo shoot so they can utilize those images for their marketing. At Greg West Photography, we adjust our fee structure for clients when other contractors involved in the project sign on for photography, too, which will reduce the cost for everyone.
TIP 2: PREPARE, PREPARE, PREPARE 📝
The location, whether interior or exterior, must look its best for your photo shoot.
Schedule the photo shoot date with the home/building owner well in advance. Make certain no workers will be present so the photographer has easy access.
Ensure it’s dusted, vacuumed, and cleaned, and all lighting is in working order.
Think about the landscaping i.e., have plants deadheaded, leaves raked, dirt swept, and lawn mowed three days ahead of the shoot. Make certain all exterior and interior lighting is in working order.
It’s up to you (the client) to ensure the location is “camera ready” to prevent delays or even rescheduling the photoshoot.
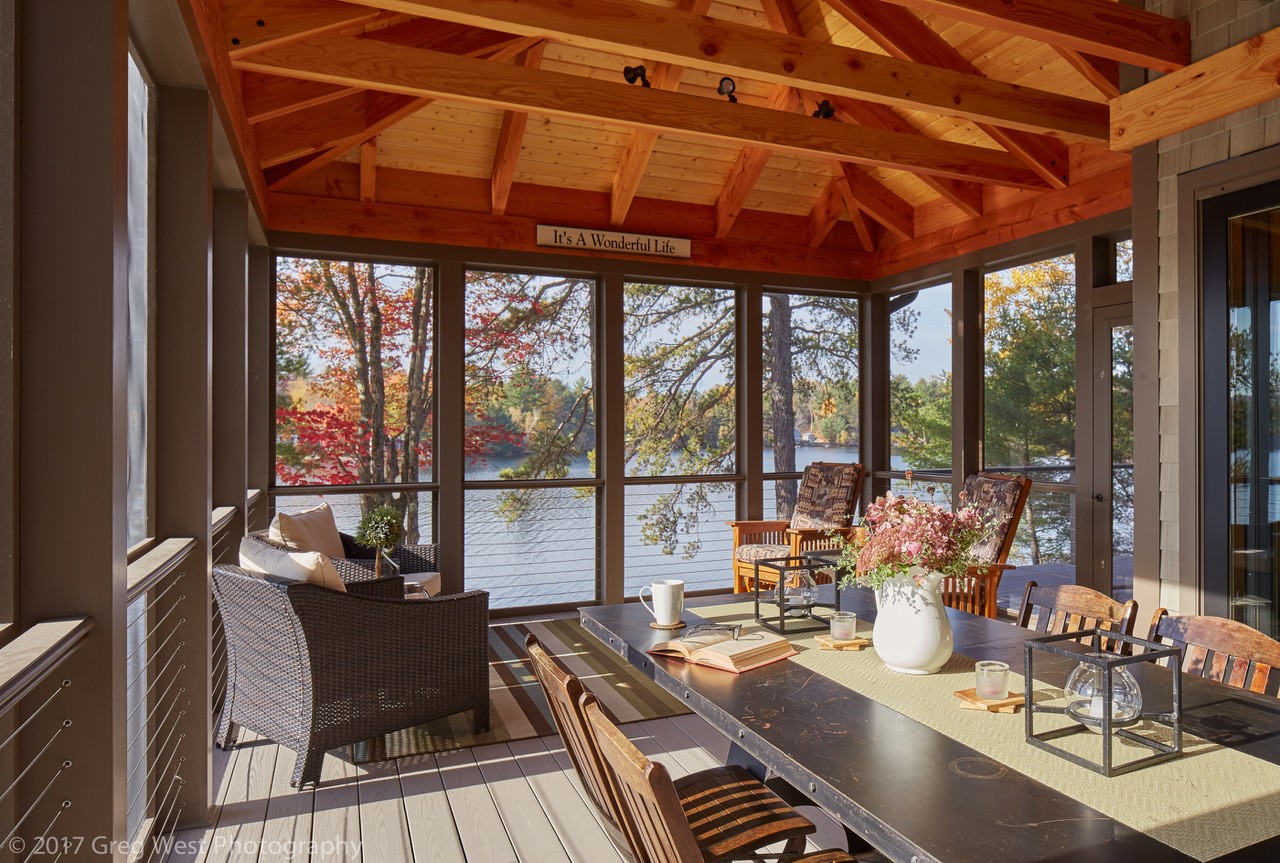
TIP 3: CREATE THE SCENE WITH PHOTO STYLING 🎬
It’s one thing to have a beautiful commercial or residential project to photograph however, thoughtful photo styling done well can take your project to the next level.
What is photo styling? Styling is adding or subtracting extras and/or accessories. These are the items that make a space look lived in and enhance the overall room design, such as rugs, flowers, artwork, food, etc. Photo styling is a balance of adding accessories, but not so many accessories that it detracts from the beauty of your project.
Talk with your photographer about who will do the styling. At Greg West Photography, we’ve worked with clients who use our in-house photo styling services and other clients who prefer to do the styling themselves.
TIP 4: DON’T OVERLOOK THE DETAILS 👀
During a photoshoot, there’s a lot going on. Before the shoot begins, it’s important to let your architectural photographer know if there are any special details you’d like to feature.
There are two types of photos: The overall look of the entire space and the detail shots focused on smaller areas. For example, perhaps you designed custom cabinets in the kitchen, and you’d like some photographs to highlight just the cabinets.
During our p👀hotoshoots, we show our clients the shots in real-time from our laptop and collaborate by discussing any modifications to make to the setup just right. Perhaps we move a plant on the counter, add a pillow, focus on millwork, or highlight a corner vignette.
Details are critical to successful architectural photographs, so be sure to tell your photographer what you need to see.
TIP 5: PHOTO REVIEW FEEDBACK TO MAXIMIZE YOUR INVESTMENT 🔍
After the photo shoot wraps, we go back to the studio and review the photos taken that day. We edit the photos in Photoshop and then schedule a time to review the final images over Zoom for our client’s feedback in real time.
By now, you likely recognize the common thread throughout each of the 5 TIPS is effective communication. It's essential to capture the photos that will help set your work apart and ultimately help you attract new clients.
BONUS TIP: FEEDBACK
Greg and I like to learn our client's likes and dislikes post photo shoots. We actively ask for feedback from our clients to ensure we met expectations and we make any changes to improve our process moving forward. I realize people may be uncomfortable sharing tough news, but just like your kids or your employees - how can your photographer improve without thoughtful feedback?
I'd love to hear if you utilized any of these 5 TIPS. Share your experiences or funny stories from a photo shoot. What worked/didn't? Comment Below ⬇️